[Swagger2] SpringBoot 설정 및 적용
Swagger
Controller의 각 메서드에 해당하는 API를 개발하기 위해서는 명세를 관리해야 하는데, 이때 명세란 해당 API가 어떤 로직을 수행하는지 설명하고 이 로직을 수행하기 위해 어떤 값을 요청하며, 그에 따른 응답값으로는 무엇을 받을 수 있는지를 정리한 자료입니다.
API는 개발 과정에서 계속 변경되므로 작성한 명세 문서도 주기적인 업데이트가 필요합니다.
또한 명세 작업은 번거롭고 시간 또한 오래걸리는데, 이와 같은 문제를 해결하기 위해 Swagger 라는 오픈소스 프로젝트를 활용할 수 있습니다.
또한 API 명세 뿐만 아니라Talend API Tester 혹은 PostMan을 주로 사용하는데 이를 대체하여 명세기능을 수행하는 Swagger에서 이를 대체하여 테스트를 진행할 수 도 있습니다.
SpringBoot3._ 버전에서는 springfox의 지원이 중단되기 때문에 springdoc의 openapi를 사용해야한다.
SpringBoot v3에서 springdoc의 openapi 설정법
build.gradle 추가
dependencies {
    implementation 'io.springfox:springfox-boot-starter:3.0.0'
    implementation 'io.springfox:springfox-swagger-ui:3.0.0'
}
Configuration 을 통한 빈 주입
@Configuration
@EnableSwagger2
public class SwaggerConfiguration {
@Bean
public Docket api() {
return new Docket(DocumentationType.SWAGGER_2)
.apiInfo(apiInfo())
.select()
.apis(RequestHandlerSelectors.basePackage("[현재 프로젝트의 루트 패키지 경로]"))
// [Group + Artifact] ex) com.example.demo
.paths(PathSelectors.any())
.build();
}
private ApiInfo apiInfo() {
return new ApiInfoBuilder()
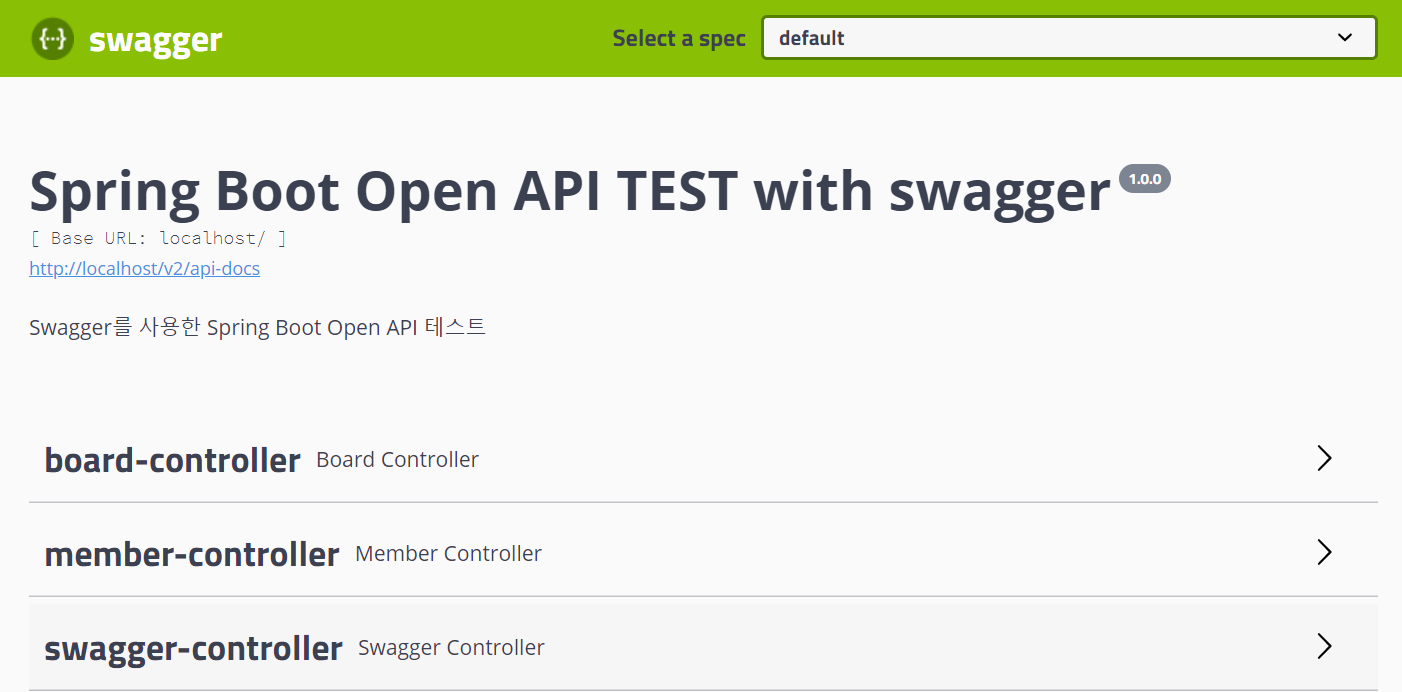
.title("Spring Boot Open API TEST with swagger")
.description("Swagger를 사용한 Spring Boot Open API 테스트")
.version("1.0.0")
.build();
}
}.apis(RequestHandlerSelectors.basePackage("[현재 프로젝트의 루트 패키지 경로]"))
// [Group + Artifact] ex) com.example.demo
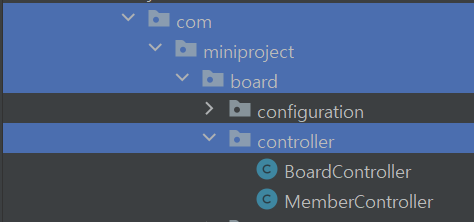
루트 패키지 경로는 기본적으로 Group + Artifact인 com.example.demo (기본값)으로 해도 컨트롤러 클래스들을 읽어오지만 필자의 경우 Controller를 모아놓은 Controller패키지가 루트 패키지 하위 디렉토리에 존재하여 com.example.demo.controller로 했고 문제없이 읽어왔다.
.apis(RequestHandlerSelectors.basePackage("com.miniproject.board.controller"))
application.properties
# Swagger
spring.mvc.pathmatch.matching-strategy=ant_path_matcher
오류발생
org.springframework.context.ApplicationContextException: Failed to start bean
'documentationPluginsBootstrapper'; nested exception is java.lang.NullPointerException
Spring boot 2.6버전 이후에 spring.mvc.pathmatch.matching-strategy 값이 ant_apth_matcher에서 path_pattern_parser로 변경된 후 특정 라이브러리에서 발생하는 오류에 대처하기 위해 application.properties파일에 위 코드를 추가한다.
Swagger접속
URL에 localhost:포트번호/swagger-ui.html 입력
@Annotation
| @ApiOperation | 대상 API의 설명을 작성하기 위한 어노테이션 |
| @ApiParam | 매개변수에 대한 설명 및 설정을 위한 어노테이션 메서드의 매개변수뿐 아니라 DTO 객체를 매개변수로 사용할 경우 DTO클래스 내의 매개변수에도 정의할 수 있다. |
example Code ▼
Controller
@RestController
@RequestMapping("/swagger")
public class SwaggerController {

    @ApiOperation(value="Swagger 예제", notes="Swagger의 기본 Annotation")
    @GetMapping("/example1")
    public String getSwaggerExam(
        @ApiParam(value = "이름", required = true) @RequestParam String name
                                                                            ) {
        return name;
    }
}

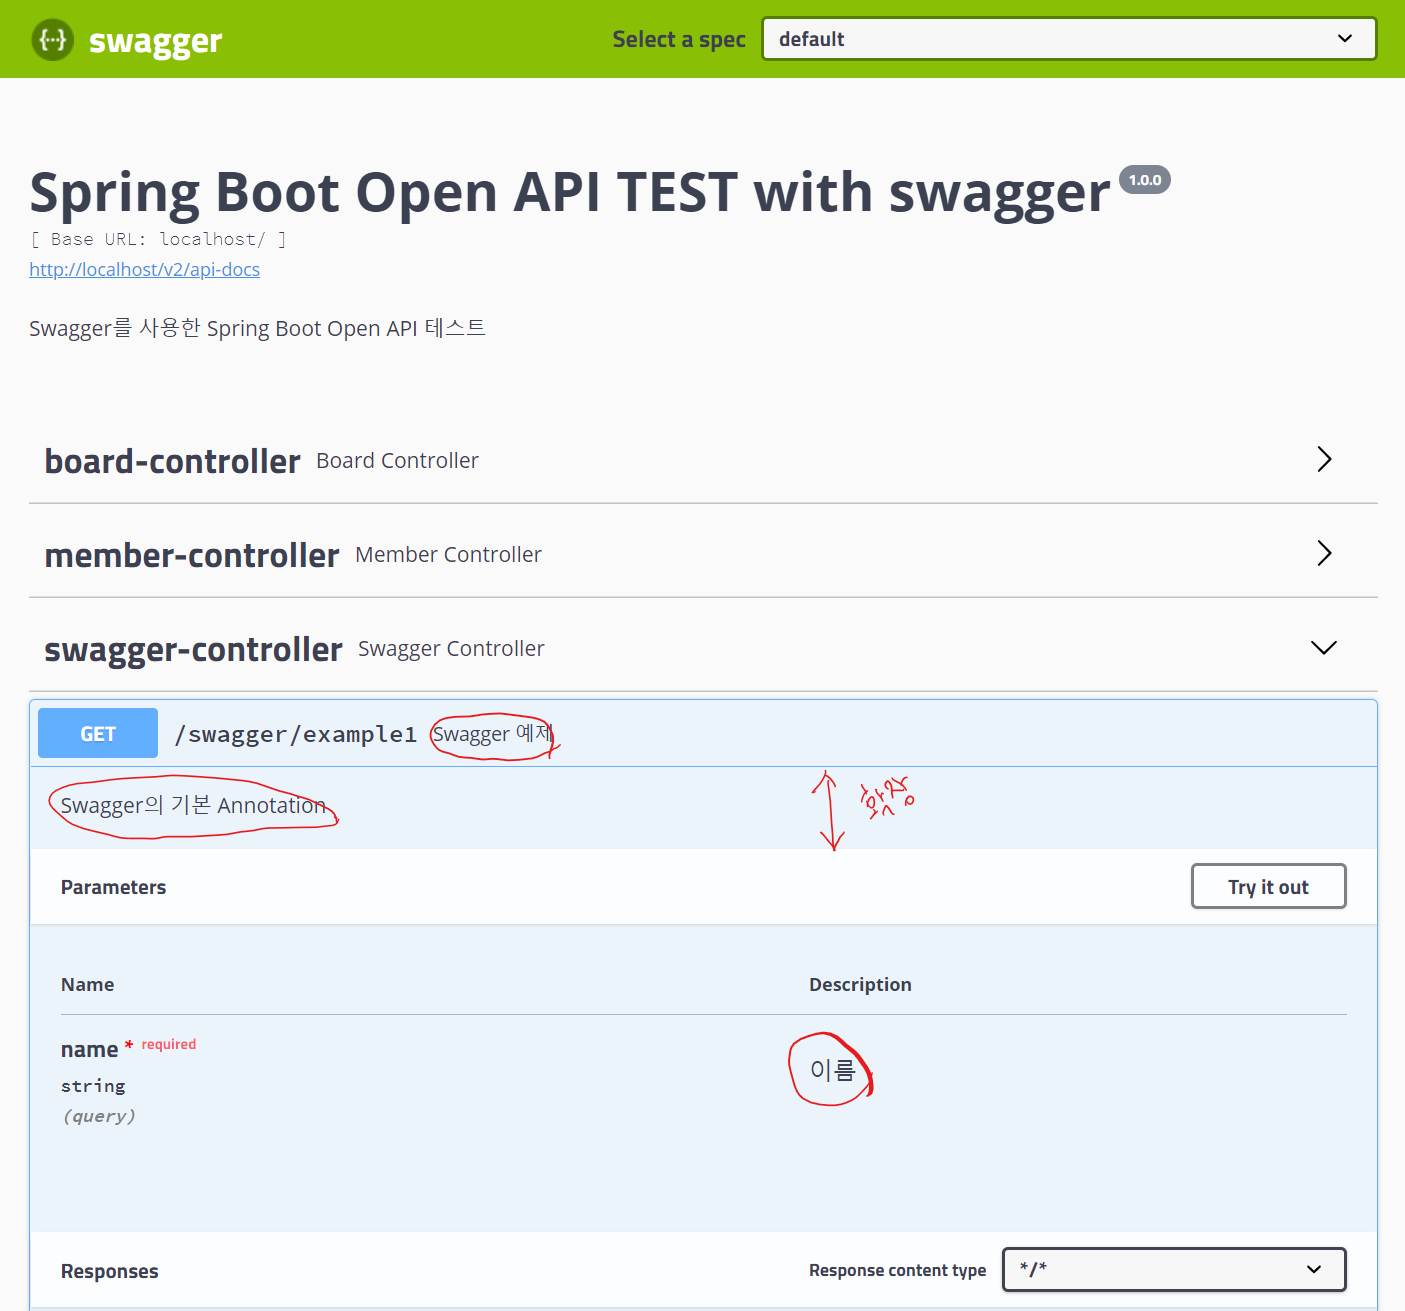
좌측은 Annotation 기능을 적용하지 않은 화면이고, 우측은 Annotation 기능을 적용한 화면입니다.
둘의 차이점은 @ApiOperation 와 @ApiParam Annotation을 적용하지 않은 화면에서는 매핑주소 우측에 기본적으로 메소드명이 자리하고, Description의 파라미터명이 변수명 자체로 표현됩니다.
@ApiOperation을 적용한다면 기본값으로 메소드명이 표현된 위치에 지정한 notes값인 Swagger 예제가 출력되며,
@ApiParam의 value값이 Description 아래에 기본값 변수명을 대체하여 출력됩니다.
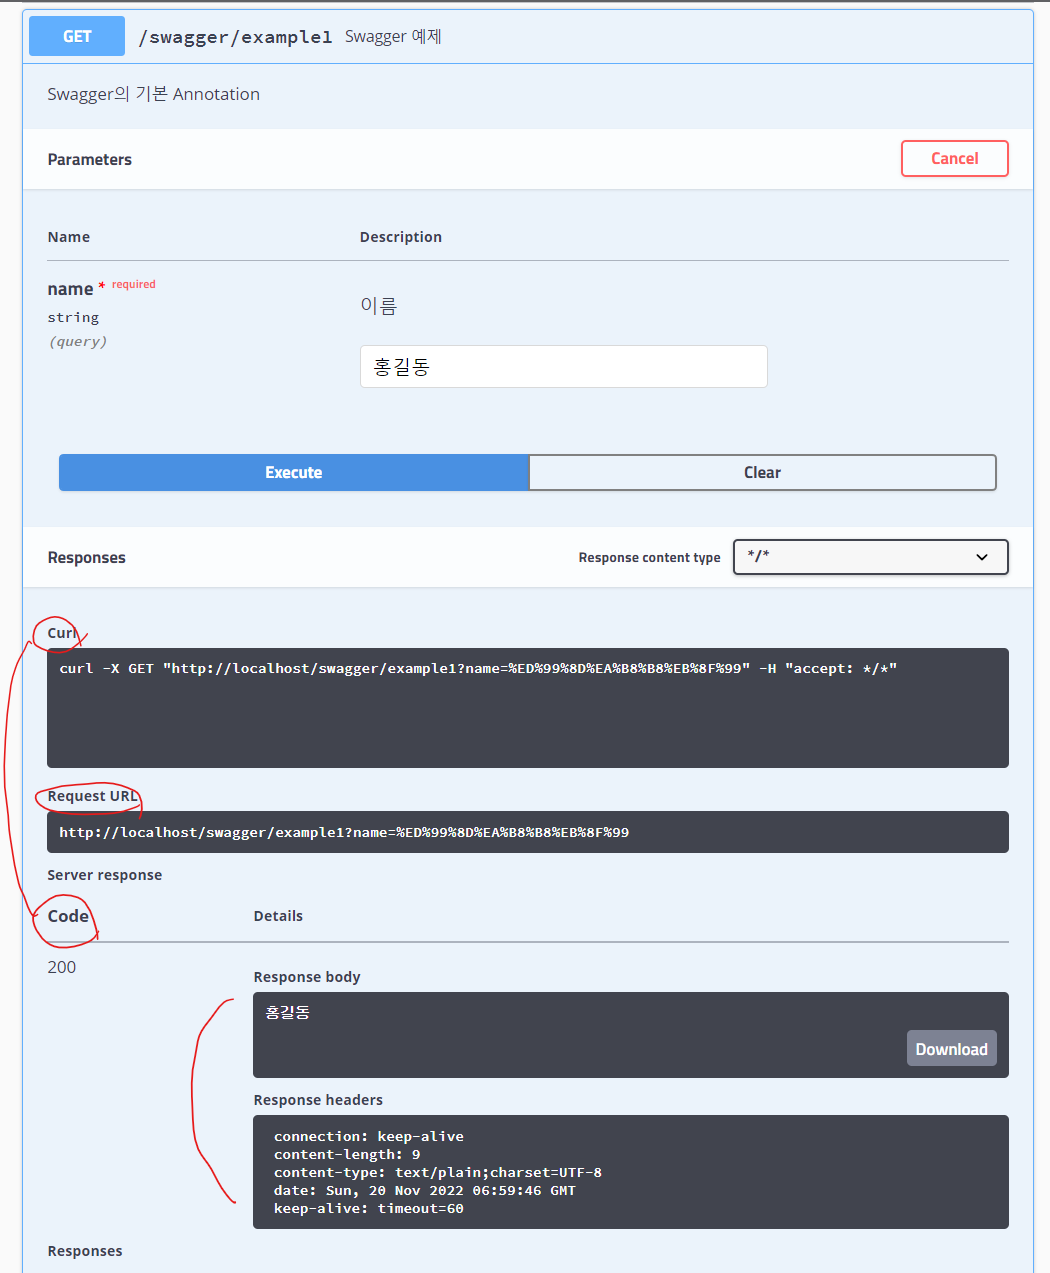
통신 테스트
Swagger는 API 명세 관리 뿐만 아니라 직접 통신도 가능합니다.
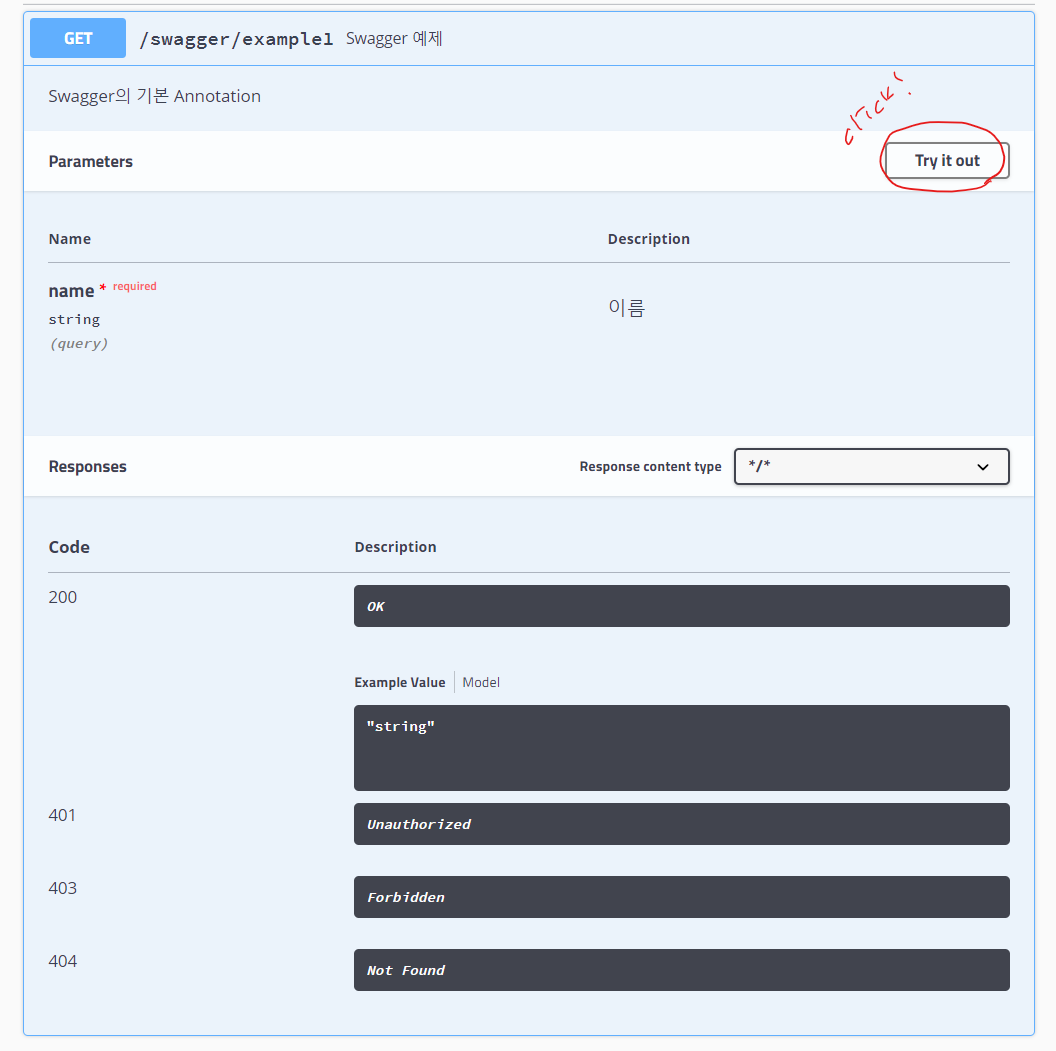
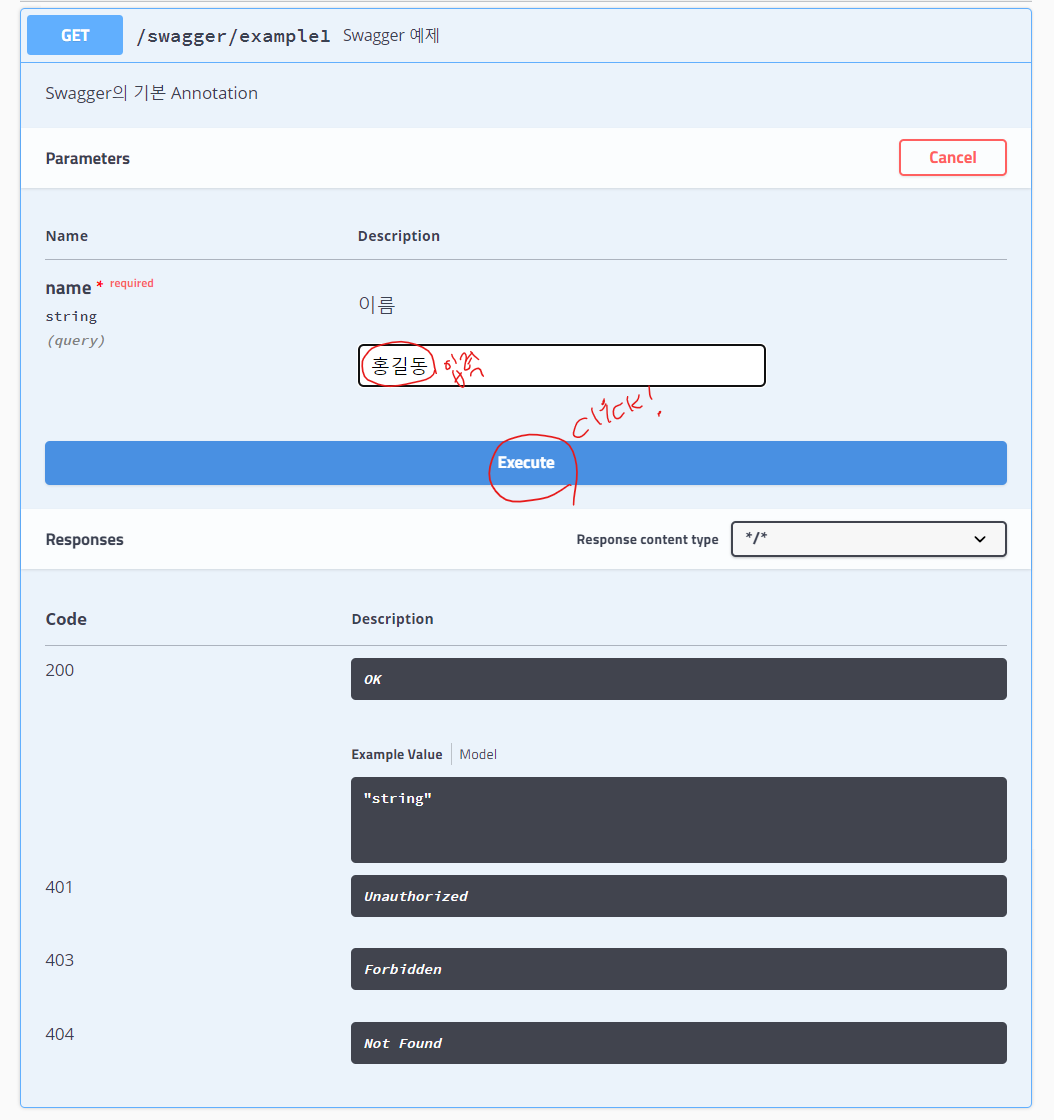
위 화면에서 Try it out 버튼을 클릭하면 각 파라미터별 값을 입력할 수 있는 폼 화면이 열리는데, 각 항목의 값을 기입하고 Execute 버튼을 클릭하면 해당 URL로 Rest통신이 실행되어 요청URL과 그에대한 결과값 모두 확인할 수 있게 됩니다.